Getting Started With Your Finder 2.0
Charge your Finder 2.0
- Use the USB-c cable to plug the Finder 2.0 to a power source.
- Let it charge for a couple of hours. We suggest recharge overnight, so you make sure it gets fully recharged.
- You will know that it is fully charged when the light turns green.
Install the Pebblebee Tracking app on your smartphone
- If you are using iOS or Android, just search for it on App Store or Google Play.
- Click here for more info How to install the Pebblebee Tracking app.
Log into the app
- Open the app.
- Enter your email and click submit.
- Enter the 6 digit verification code you received in your email. Having problems logging in? Click here.

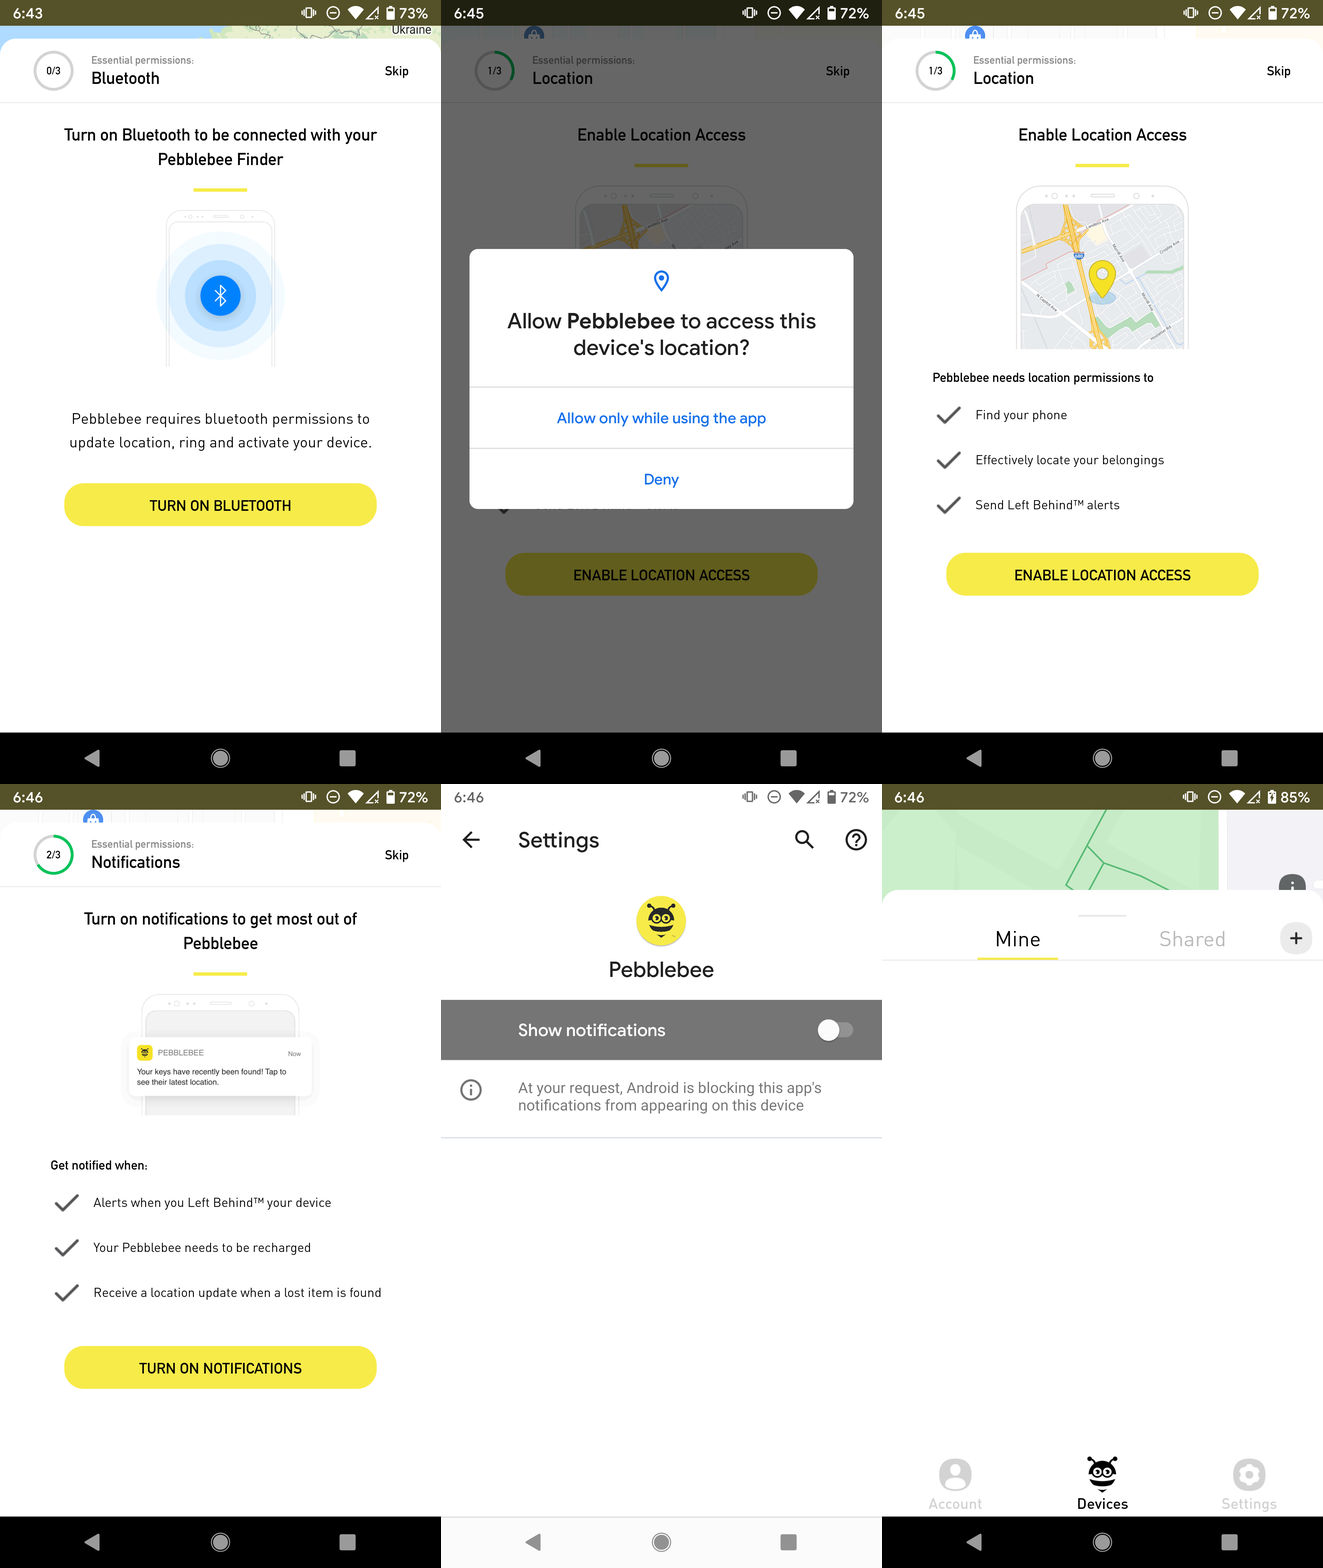
Accept all permissions
- Make sure you accept all permissions, they are essential for getting the most usage of your tracker.

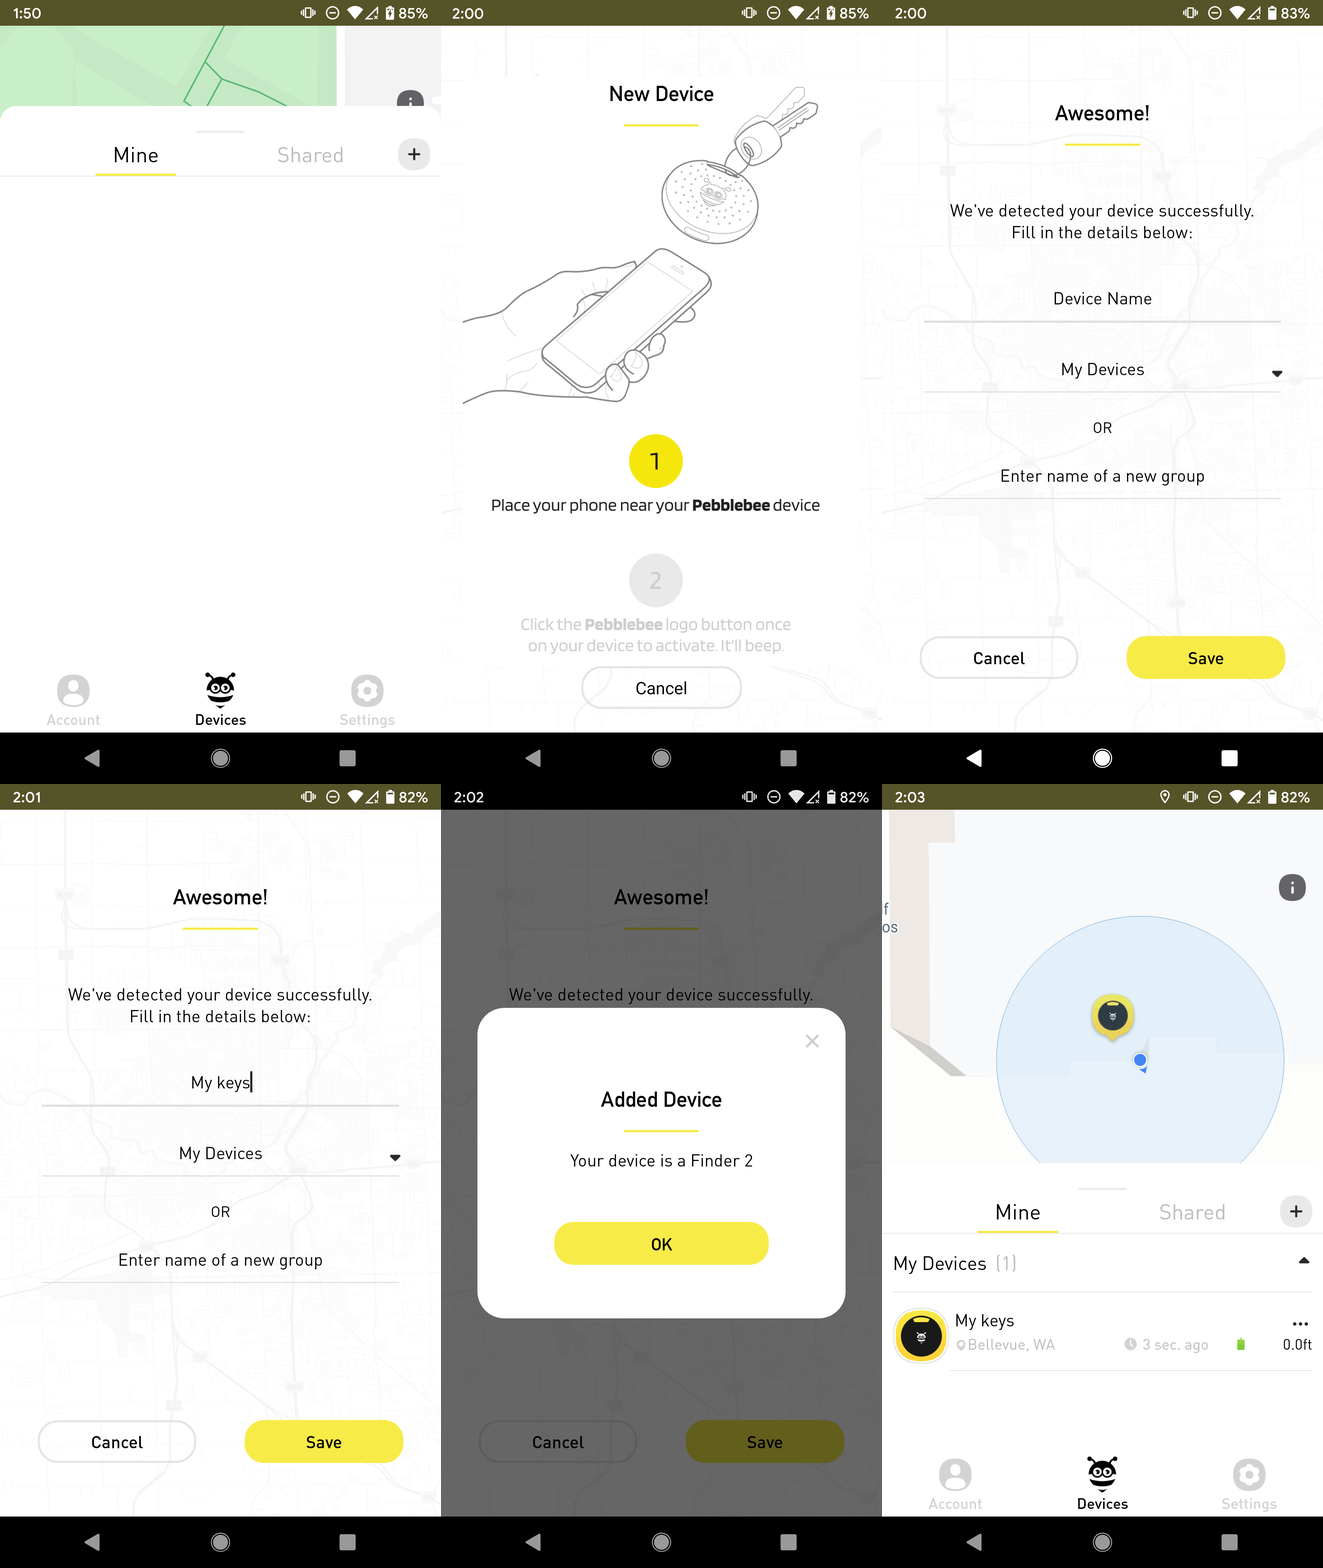
Claim it
- Open the app.
- Click on the Devices tab and select the + sign on the upper right corner.
- Get your Finder 2.0 close to the phone and quickly press the button.
- Wait until the phone successfully recognizes the app. You will be prompted to add a name once it was detected.
- Optionally, you can also create or select a group to add your device.
- Once you’ve entered the name, press save.

If you have any trouble doing this step, check some troubleshooting steps here. Why I can't claim my device?
- Done. Now you are able to buzz and check the most recent location of your device.
